
Ever taken a bite of soft, fluffy, airy, and moist sourdough bread that feels like heaven for your taste buds? To get this type of bread, you need to use highly hydrated dough. At the same time, highly hydrated dough is a little tricky to handle.
I remember I always failed to make perfect high hydration sourdough bread because it was sticky. I couldn’t handle it, but one day, my teacher taught us surprising tips to work with high-hydration sourdough bread.
After learning those tips, my life became trouble-free. So, in this article, I am writing the same tips and tricks that my teacher taught so that you can also bake perfect high-hydration sourdough bread without any difficulty.
Tips For Working With High Hydration Sourdough Bread

Fig 1 – Tips for working with high-hydration sourdough bread
High-hydration sourdough bread typically starts in the 70% hydration range. It is likely to be at the 80% level most of the time.
Now, let me tell you all some of my best advice or tips for working with high-hydration sourdough bread.
1. Bringing Hydration Down
If the recipe says around 75% hydration to add, but you think it will get very thin or sticky, then you can always reduce the amount of water and start somewhere around 65 to 70%.
As you get more confident, you can increase your hydration level. Don’t use all the water at once. Keep it a slow process.
2. Autolyse
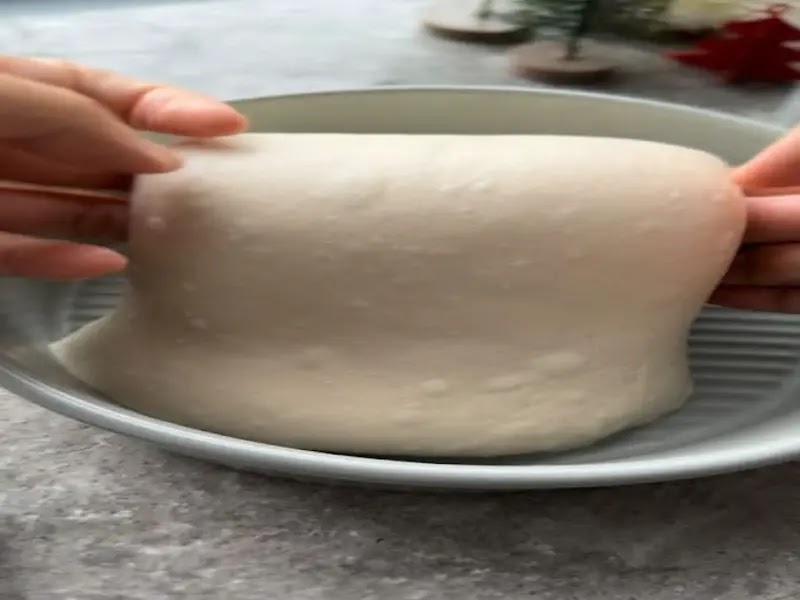
Fig 2 – Autolyze process
Autolyse is when we mix our flour with water only and let that rest for a while. This step allows the flour to absorb all the water and activates gluten formation, which makes working with high-hydration sourdough bread much simpler.
When you first mix the flour and water, you will notice that as you pull the dough apart, there is no structure. When you let the dough sit for about 30 minutes, you will see that it’s so much stretchier. It is because we let it rest and do some work for us. This also makes bread Soft and fluffy.
If you want to learn where to put dough for resting, you can visit our article that describes this topic deeply: Where To Put Dough To Rise And What Temperature Is Best?
3. To Use Wet Hands

Fig 3 – Kneading with wet hands
Always use wet hands while building strength in the dough because moist or greasy hands will not let the dough stick to your hands. So always make your hands wet or greasy by applying a small amount of water or cooking oil while kneading and stretching.
4. Learn To Read Strength In Your Dough
Stopping the process of stretching and folding should not be done until you are satisfied with the strength of your dough. You need to check the strength of the dough because sometimes you might need some additional stretching and folding to build strength.
So, to check the strength of the dough, you can do the windowpane test.
Windowpane Test
In this test, you have to pull a corner of the dough and stretch it. If it breaks, then it is an indication that you need to build some more strength. If you can pull that dough, you have a strong gluten structure.
Here is a short video for your reference to know more about the windowpane test: How to do the windowpane test properly.
5. Preserving Air

Fig 4- Large holes in high hydration sourdough bread
When working with high hydration sourdough bread, make sure to preserve as much air as you can. When you shape the dough, you must be gentle with it so that the inside trapped air does not get a chance to leak.
This preserving of air in the dough results in large holes in the crumbs of sourdough bread.
If you want to know more about the hole in the bread, then you should read our article: Hole in Bread: Learn Every Cause and Solution.
6. Flouring The Dough
Make sure to put flour on the counter rather than on the top of the dough because the top of the dough must be sticky; only then will it hold its shape.
7. Quick Movements
The slower you are, the more bread will stick to your hands. So be quick and firm.
8. Pre Shaping

Fig 5 – Round shape dough
Pre-shaping means quickly shaping your dough into round balls. It helps configure the gluten structure in such a way that it will help hold its shape better when you do the final shaping.
9. Final Shaping
The next tip is when you do your final shaping. Build a tension on the outside of your dough.
10. Cold Proofing

Fig 6 – Proofing of dough
The final tip for working with a high hydration sourdough bread is to keep it in the refrigerator before placing it into the oven. Scoring a room temperature dough is very difficult because of high hydration.
After the final shaping, put the dough in the refrigerator overnight, around 10 to 12 hours. It is going to be much easier to hold its shape.
The Benefits Of High Hydration Sourdough Bread
Till now, we have seen how to fix high-hydration sourdough bread. But we are now we are going to look at their benefits.
High-hydration sourdough bread also has many benefits. It is much more aromatic and crusty than ordinary bread. Let’s see what they are.

Fig 7 – Benefits of high hydration sourdough bread
1. Improved Texture
High hydration results in a lighter and Softer crumb structure and also creates an open crumb of sourdough bread.
2. Crispy Crust
The high water level also results in a crispy and crunchy crust in combination with soft open crumbs.
3. Nutrient Density
More water breaks macronutrients in ingredients and makes it feasible for the human body to digest.
4. Longer Shelf Life
Increased hydration levels can contribute to longer shelf life and keep the bread from molding compared to low hydration level bread.
Frequently Asked Questions
1: What Hydration Should Sourdough be?
Firstly, it depends on how much hydration you can handle while baking sourdough bread.
For me, 70-80% hydration works best. 70-80% hydration means taking 310 to 400g water and 420 to 510g flour.
Setting a hydration level also depends on the experience and ingredients you are using.
2: What Does Higher Hydration Do To Sourdough Bread?
High hydration sourdough bread gives you a naturally crispier and thinner texture.
3: What is 100% Hydration Sourdough?
It means taking equal parts of flour and water. It is also known as classic starter sourdough bread.
4: What is the basic calculation to calculate sourdough hydration level?
To calculate sourdough hydration level, divide the amount of water by the amount of flour and then multiply it by 100 to get the percentage.
Conclusion
So this is all about high-hydration sourdough bread. Through gentle handling, autolyzing, preserving air, flouring the dough, pre-shaping and cold proofing, one can achieve working with high-hydration sourdough bread.
Only with experience can you be a master at making high hydration sourdough bread. With time, you will explore different tricks to handle the dough easily.
So, let your kitchen be your canvas. With practice, patience, experience, and passion, you will learn to bake high hydration sourdough bread that everyone loves.
More Resources
The Ultimate Guide to Choosing the Best Bread for French Toast
How to Make Banana Bread – The Simplest Guide with Best Working Tips