
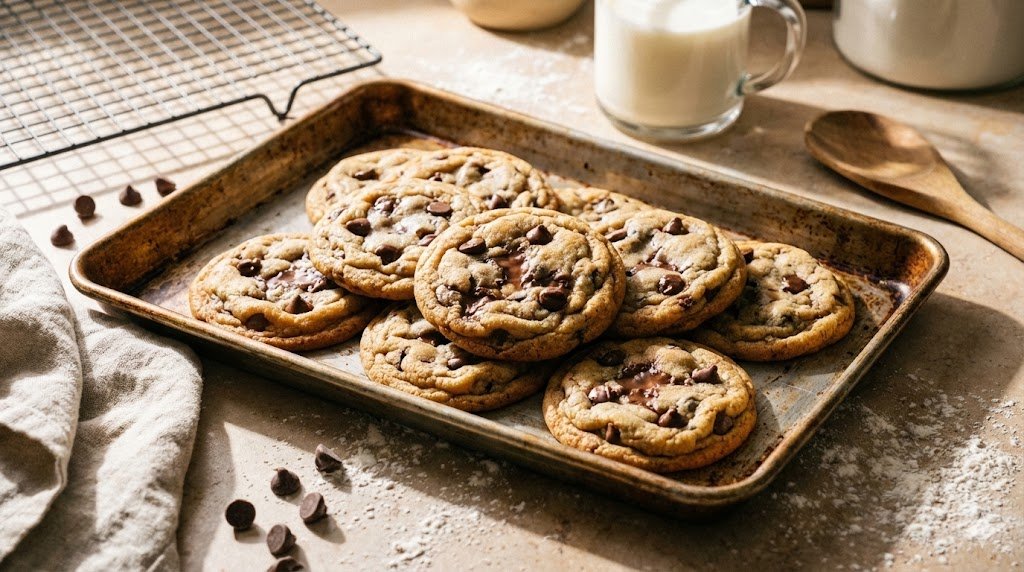
Let’s be real for a second. I don’t trust people who prefer crispy cookies. You know the type—the ones who reach for that sad, dry disc that shatters into dust the moment you bite it. That’s not a cookie; that’s a cracker with an identity crisis. If you are here, it’s because you understand the truth: a cookie should bend, not break. It should be crisp on the edges, gooey in the center, and buttery enough to make your cardiologist slightly concerned. 🍪
I spent years making average cookies. I followed the recipe on the back of the chocolate chip bag (we’ve all been there), and the result? Mediocre. They tasted fine, but they lacked that bakery-style texture. You know, that density that makes your eyes roll back in your head. After hundreds of batches, a few kitchen disasters, and enough sugar to power a small village, I finally cracked the code.
Today, I’m sharing the secret to the Ultimate Soft & Chewy Chocolate Chip Cookie. Put away the fancy equipment; you don’t even need a mixer for this one. We are going rustic, we are going melted butter, and we are absolutely going to eat the dough. Let’s get baking. 🥣
The Science: Why These Cookies Actually Work
Ever wondered why some cookies turn out like cakes and others like pancakes? It all comes down to the fat and the sugar. Baking is chemistry, but don’t worry, I won’t make this a boring lecture.
Melted Butter vs. Creamed Butter
Most recipes tell you to “cream” soft butter and sugar. That incorporates air, making the cookie fluffy and cake-like. We don’t want cake. We want dense, chewy fudge-factor. By using melted butter, we eliminate that air. The result? A denser, richer dough that spreads just enough. Plus, you don’t have to wait for butter to soften on the counter. Win-win. 🏆
The Brown Sugar Supremacy
White sugar makes things crisp. Brown sugar makes things moist and chewy because it contains molasses. For this recipe, we use a high ratio of dark brown sugar. The acid in the molasses reacts with the baking soda to create a tender lift, while the moisture keeps everything soft for days. IMO, light brown sugar just doesn’t cut it here. Go dark or go home.
The Secret Weapon: Cornstarch
Yes, cornstarch. You usually use this to thicken gravy, but in cookies, it works magic. It softens the proteins in the flour, ensuring the cookie stays tender rather than tough. Think of it as your insurance policy against hard cookies.
The Ingredients: Don’t Skimp on Quality
You need the right tools for the job. Here is exactly what you need to grab from the pantry.
- 2 ¼ cups (280g) All-Purpose Flour. (Measure this correctly! Fluff the flour, scoop it, and level it. If you pack it in, you get rocks).
- 1 tsp Baking Soda.
- 1 ½ tsp Cornstarch (The secret weapon).
- ½ tsp Salt. (I use sea salt because I love that salty-sweet contrast).
- ¾ cup (170g) Unsalted Butter, melted and slightly cooled. 🧈
- ¾ cup (150g) Dark Brown Sugar, packed.
- ½ cup (100g) Granulated White Sugar.
- 1 large Egg + 1 large Egg Yolk. (That extra yolk adds fat and richness).
- 2 tsp Vanilla Extract. (Measure with your heart; I usually splash a bit more).
- 1 ¼ cups (225g) Semi-Sweet Chocolate Chips or Chunks.
Step-by-Step Instructions: Let’s Make Magic
Follow these steps exactly. I wrote them in the active voice so you know I mean business.
Step 1: The Dry Mix
Grab a medium bowl. Whisk together the flour, baking soda, cornstarch, and salt. Whisk it well. You want to break up any clumps of baking soda so nobody bites into a bitter pocket of powder. Set this aside.
Step 2: The Liquid Gold
In a large bowl, pour in your melted butter. Add the brown sugar and white sugar. Whisk this vigorously for about 2 minutes. You want the mixture to look glossy and smooth. The sugar won’t fully dissolve, and that’s fine. We just want them to become best friends.
Step 3: The Binding Agents
Add the egg, the extra egg yolk, and the vanilla. Whisk again. The mixture will lighten in color and look slightly thickened. This is the emulsion that holds the fat and water together. Don’t skip the whisking here; give it some muscle! 💪
Step 4: The Marriage
Pour the dry ingredients into the wet ingredients. Switch to a rubber spatula or a wooden spoon. Gently fold the mixture together. Stop mixing the second you see the last streak of flour disappear.
Why stop so soon?
Overmixing develops gluten. Gluten makes bread chewy, but it makes cookies tough. We want tender cookies. Treat the dough gently.
Step 5: The Chocolate Shower
Dump in the chocolate chips. Fold them in just enough to distribute them evenly. I prefer semi-sweet because the dough is quite sweet, and the bitterness provides balance. If you use milk chocolate, prepare for a sugar rush. 🍫
Step 6: The Hard Part (The Chill)
Cover the bowl with plastic wrap. Put it in the refrigerator. Leave it there for at least 2 to 3 hours.
I know, I know. You want cookies now. But this step is non-negotiable. Chilling the dough allows the flour to hydrate fully and the fat to solidify. If you bake them now, they will spread into flat, greasy puddles. Chill the dough. Go watch a movie. Your patience will pay off.
Baking: The Final Countdown
- Preheat: Set your oven to 350°F (175°C). Line a large baking sheet with parchment paper or a silicone mat. (Never grease the pan directly; it burns the bottoms).
- Scoop: Take your chilled dough. Scoop tall, golf-ball-sized mounds (about 3 tablespoons each). Roll them slightly with your hands to make them round, then tear the ball in half and squish the rough sides together on top.
- Pro Tip: This “tear and squish” method creates those craggy, rustic tops that look amazing on Instagram.
- Space: Place them on the baking sheet, leaving about 2 inches of space between them. They will spread.
- Bake: Pop the tray into the oven. Bake for 11–12 minutes.
- The Look: Pull them out when the edges look golden brown and set, but the centers still look slightly undercooked and soft. Do not overbake them. They continue to cook on the hot tray after you remove them from the oven. If they look done in the oven, they will be overdone on the plate.
The “Pan-Bang” Trick
Want those beautiful ripples on the edge of your cookie? Try this.
When the cookies have about 3 minutes left in the oven, open the door. Lift the baking sheet up about 4 inches and drop it onto the oven rack. Bang!
This collapses the puffed-up center, pushing the dough out to the sides and creating ridges. Repeat this one more time before taking them out. It’s loud, it scares the cat, but it makes the cookies look professional. 💥
Serving & Storage
Let the cookies cool on the baking sheet for at least 10 minutes. If you try to move them immediately, they will fall apart because they are so soft. Transfer them to a wire rack to finish cooling (or just eat them warm; I won’t judge).
Storage:
Store these in an airtight container with a slice of white bread.
- Wait, what?Yes, bread. The cookies draw moisture from the bread, keeping them soft for up to 5 days. The bread will turn hard as a rock, but your cookies will stay fresh. It’s magic. 🪄
Nutritional Information (Per Cookie)
Look, these are cookies. They contain butter, sugar, and chocolate. They are good for the soul, not necessarily the waistline. But since you asked…
| Nutrient | Amount |
| Calories | ~280 kcal |
| Total Fat | 14g |
| Carbohydrates | 36g |
| Sugars | 24g |
| Protein | 3g |
FYI: This assumes a yield of about 15 large cookies. If you make them smaller, the calorie count drops. But why would you make them smaller?
Troubleshooting: Why Do My Cookies Suck?
I’ve heard all the complaints. Let’s troubleshoot your disaster.
- “They are flat puddles!”You didn’t chill the dough, or your butter was too hot when you mixed it. Or, your baking soda is expired. Check the dates!
- “They are puffy and cakey!”You added too much flour. Did you scoop the flour directly with the measuring cup? That compacts it. Weigh your flour or use the “spoon and level” method.
- “They are hard!”You overbaked them. Remember, pull them out when they look underdone. Trust the carry-over cooking.
- “They burned on the bottom!”You used a dark-colored baking sheet. Dark metal absorbs heat faster. Reduce the oven temp by 25°F if you only have dark pans.
Variations: spice It Up
Once you master the base, get creative.
- The Sweet & Salty: Sprinkle flaky sea salt (like Maldon) on top immediately after they come out of the oven. The salt makes the chocolate pop.
- The Nutty Professor: Add ½ cup of toasted walnuts or pecans for crunch.
- The Brown Butter Upgrade: Brown the butter in a saucepan before using it. This adds a nutty, toffee-like flavor that is absolutely insane. Just make sure to let it cool down before adding the sugar.
Conclusion: Go Preheat Your Oven
There you have it. You now possess the knowledge to make The Ultimate Soft & Chewy Chocolate Chip Cookies. No more guessing, no more dry disappointments.
Baking is a science, but eating these is pure art. Whether you are making them for a party, a breakup, or just a Tuesday night (no reason needed), these cookies deliver.