Let’s be honest. Most cookies are brown. Chocolate chip, oatmeal raisin, peanut butter—they all rock a shade of beige that, while delicious, isn’t exactly turning heads at a party. But then walks in the Red Velvet Crinkle Cookie. It’s the Lady Gaga of the baking world. It’s loud, it’s dramatic, and it demands attention. ❤️
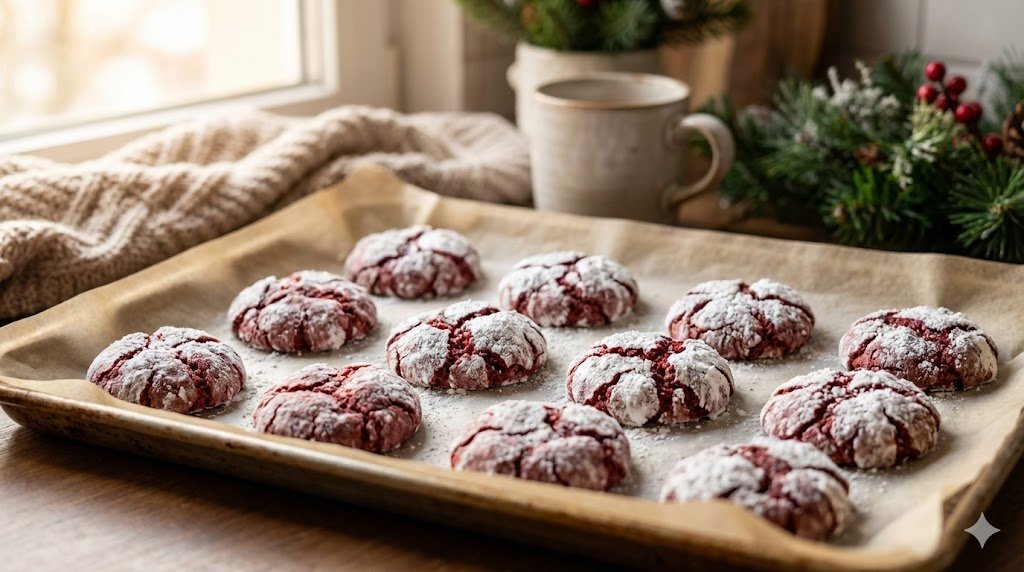
For the longest time, I thought red velvet was just “chocolate with an identity crisis.” I mean, is it vanilla? Is it chocolate? Is it just a vehicle for cream cheese frosting? (The answer is yes to all three, FYI). But when you turn that flavor profile into a crinkle cookie, magic happens. You get this fudgy, brownie-like center wrapped in a crispy, snowy shell that looks like tectonic plates shifting on a sugar planet.
I bake these every year for the holidays, and every year, people fight over them. They look impressive, like you spent hours tempering chocolate or piping intricate designs. In reality? You rolled some dough in sugar and let the oven do the work. If you want a recipe that delivers maximum visual impact with minimal effort, you have found your match. Let’s get baking. 🍪
The Science: What Makes It “Crinkle”?
You might ask, “Why does the top crack like that?” It’s not an accident; it’s chemistry.
The crinkle effect comes from the outer layer of the cookie drying out faster than the inside. As the cookie spreads and rises in the oven, that dry, sugary crust pulls apart, revealing the soft, expanding dough underneath.
Because we coat the dough in powdered sugar before baking, those cracks create a stark contrast between the white sugar and the deep red interior. It’s visually striking. But here is the secret: to get a truly good crinkle, you need to manage your moisture. If the dough is too wet, the sugar melts into a glaze. If it’s too dry, it won’t spread. We are aiming for the Goldilocks zone. 🧪
The Ingredient Lineup: No Fake Stuff Here
We need specific ingredients to nail the flavor and the texture. Red velvet isn’t just dyed chocolate cake; it needs a tang.
The Dry Team
- 2 ¼ cups (285g) All-Purpose Flour.
- 1/3 cup (30g) Unsweetened Cocoa Powder.
- My Advice: Don’t use Dutch-processed cocoa here. We want regular natural cocoa. The acid in natural cocoa reacts better with the baking soda to create lift.
- 1 ½ tsp Baking Powder.
- ¼ tsp Salt.
The Wet Team
- ½ cup (115g) Unsalted Butter, softened.
- 1 ½ cups (300g) Granulated Sugar (for the dough).
- 2 Large Eggs.
- 2 tsp Vanilla Extract.
- 1 tbsp Lemon Juice or White Vinegar.
- The Secret Weapon: This provides the acidity that mimics buttermilk in a traditional red velvet cake. It gives the cookie that subtle tang. 🍋
- 1 tbsp Red Food Coloring (Gel preferred).
- Note: Liquid coloring works, but it adds extra water. Gel coloring gives you a vibrant, blood-red hue without messing up the dough consistency.
The Rolling Station
- ½ cup Granulated Sugar.
- ½ cup Powdered Sugar (Confectioners’ Sugar).
Step-by-Step Instructions: Mix, Chill, Roll
Follow this workflow. The chilling step is non-negotiable unless you want flat, sad red pancakes.
Step 1: The Creaming Phase
Grab your stand mixer or a hand mixer. Beat the butter and 1 ½ cups of granulated sugar together on medium-high speed.
Do this for 3–4 minutes.
- Why? You want it light and fluffy. We are mechanically forcing air into the butter. This helps the cookies puff up later.
Step 2: The Liquid and The Red
Add the eggs, one at a time, beating well after each addition.
Pour in the vanilla, lemon juice, and red food coloring.
Mix until combined.
- Warning: At this stage, your batter will look like a crime scene. Don’t splash it on your white shirt. I learned that the hard way. :/Scrape down the sides of the bowl. We leave no butter behind.
Step 3: The Dry Mix
In a separate bowl, whisk the flour, cocoa powder, baking powder, and salt.
Turn the mixer to low speed.
Slowly add the dry ingredients to the wet.
Stop mixing the second you see no more flour streaks. Overmixing develops gluten, which makes the cookies tough. We want tender, fudgy bites.
Step 4: The Big Chill
Cover the bowl with plastic wrap.
Put it in the fridge for at least 2 hours (or overnight).
- Crucial Step: The dough is sticky right now. If you try to roll it, you will just have red glue on your hands. The butter needs to solidify so the cookies don’t spread too fast in the oven. Go watch a movie. Relax. ❄️
Step 5: The Double Roll Technique
Preheat your oven to 350°F (175°C). Line two baking sheets with parchment paper.
Scoop the chilled dough into balls (about 1.5 tablespoons each).
Roll 1: Roll the ball in the Granulated Sugar first.
Roll 2: Roll the ball heavily in the Powdered Sugar.
- The Hack: Why two sugars? The granulated sugar acts as a barrier. It prevents the moisture in the dough from soaking up the powdered sugar. This ensures your cookies stay snowy white on top instead of turning into a yellow glaze. 🍬
Step 6: The Bake
Place the balls on the baking sheet, spaced 2 inches apart.
Bake for 10–12 minutes.
- The Visual Cue: The edges should look set, but the centers will still look slightly underbaked and soft. Take them out.They continue cooking on the hot pan for a few minutes. If you bake them until they feel firm in the oven, they will be rocks when they cool.
Texture Experience: What to Expect
When you bite into these, you should experience three distinct sensations:
- The powdery mess: You will get sugar on your lips. Embrace it.
- The snap: The sugar crust offers a delicate resistance.
- The fudge: The inside should feel like a brownie—dense, moist, and slightly chewy.
If it snaps all the way through like a Gingersnap, you overbaked it. If it falls apart like raw dough, you underbaked it. Aim for the middle.
Nutritional Information (Per Cookie)
Let’s look at the stats. This recipe yields about 24 cookies.
| Nutrient | Amount |
| Calories | ~140 kcal |
| Fat | 5g |
| Carbs | 22g |
| Sugar | 16g |
| Protein | 2g |
FYI: It’s a cookie. It has sugar. Don’t stress about the macros; just enjoy the moment.
Troubleshooting: Why Did My Snow Melt?
I’ve had batches turn into ugly red puddles. Here is what went wrong:
- “The powdered sugar disappeared!”You skipped the “Granulated Sugar Roll” step, or your dough was too warm. The moisture ate the sugar.
- “They are flat!”You didn’t chill the dough long enough, or your baking powder is expired. Check the date on the can!
- “They aren’t red enough!”You used cheap liquid food coloring. You really need the concentrated gel paste to fight the brown color of the cocoa powder.
Variations: Level Up Your Cookie
The classic is great, but sometimes I like to get chaotic in the kitchen.
1. The Cheesecake Stuffed
- The Hack: Freeze dollops of sweetened cream cheese. Wrap the red velvet dough around the frozen cheese ball. Roll in sugar and bake.
- Verdict: It tastes like a slice of actual red velvet cake. It’s insane. 🍰
2. The White Chocolate Chip
- The Add-in: Fold ½ cup of white chocolate chips into the dough before chilling.
- Verdict: The milky sweetness of the white chocolate pairs perfectly with the cocoa.
3. The Sandwich
- The Build: Bake the cookies slightly smaller. Pipe cream cheese frosting between two cooled cookies.
- Verdict: A posh Oreo.
Storage: Keeping the Crunch
Red Velvet Crinkle Cookies are sturdy, but humidity is their enemy.
- Room Temperature: Store in an airtight container for up to 5 days.
- The Bread Trick: If they start to get hard, throw a slice of white bread in the container. The cookies absorb moisture from the bread and stay soft. (Physics is cool, right?).
- Freezing: You can freeze the baked cookies for up to 3 months. Or, freeze the raw dough balls (without sugar). When you want a cookie, roll the frozen ball in sugar and bake—just add 2 minutes to the cooking time.
Why This Cookie Wins the Swap
Ever wondered why these are the first to disappear at a cookie exchange? It’s the color. In a sea of brown gingerbread and beige sugar cookies, the vibrant red screams “Eat me.”
Plus, the flavor is complex. It’s not just sweet; it has that hint of chocolate and that subtle tang from the lemon juice. It keeps you coming back for a second one. (Or a third. Who’s counting?).
Conclusion: Roll With It
There you have it. You now possess the blueprint for the Red Velvet Crinkle Cookie.
It’s messy to make (seriously, watch out for that food coloring), but the payoff is huge. You get a dessert that looks like it came from a high-end bakery, made right in your messy kitchen.
So, grab that red dye. chill that dough. And prepare to get powdered sugar all over your shirt.