
Let’s be honest. Does anyone genuinely enjoy unwrapping forty tiny chocolate kisses in a row? It tests your patience, destroys your manicure, and leaves you surrounded by a pile of silver foil that looks like a robot exploded in your kitchen. But we do it anyway. Why? Because Peanut Butter Blossoms are the undisputed champions of the cookie world. 🏆
You can keep your intricate, royal-icing-flooded sugar cookies. They look pretty, but they taste like chalk. I want the cookie that combines the two greatest food groups in existence: salty peanut butter and sweet milk chocolate.
I still remember the first time I made these. I thought I could outsmart the recipe by putting the chocolates on before baking. I ended up with a tray of what looked like sad, melted mud puddles. :/
So, learn from my tragic mistakes. Today, we master the art of the perfect blossom. We want a soft, chewy peanut butter base, a sparkly sugar coating, and a chocolate kiss that holds its shape but melts the second it hits your tongue. Grab your mixer and let’s get messy. 🥜
Why This Cookie Outlives Every Trend
You might wonder, “Why does this 1950s recipe still dominate holiday exchanges?”
It comes down to texture and nostalgia. The dough itself isn’t just a sugar cookie with nuts; it’s a dense, rich peanut butter delivery system. By rolling the dough balls in sugar before baking, you create a crispy, crackly exterior that shatters slightly when you bite into it.
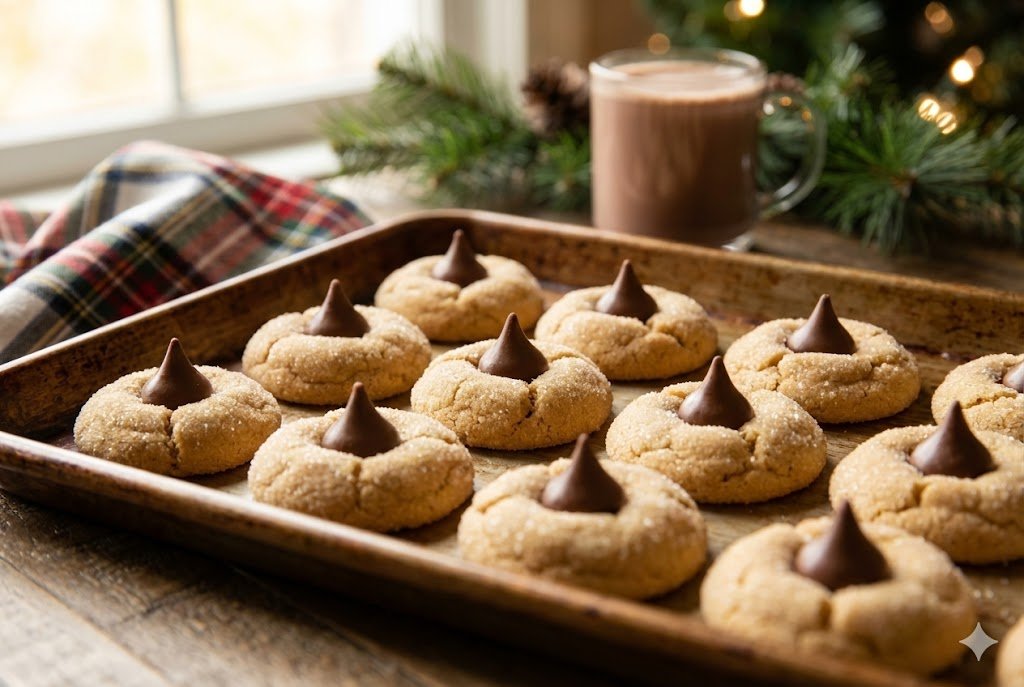
Then you have the mechanics of the “Kiss.” Pressing the chocolate into the hot cookie creates those iconic cracked edges. It looks rustic and homemade in the best way possible. It screams, “I made this with love (and probably ate three of them warm off the pan).”
Plus, they freeze beautifully. You can stash a bag of these in your freezer and eat them cold in July. IMO, frozen Peanut Butter Blossoms taste even better than fresh ones. The chocolate gets a snap to it that is downright addictive. ❄️
The Grocery List: No Substitutions Allowed
I need you to listen closely here. Baking is science, not jazz. You cannot just throw in whatever nut butter you have in the pantry and hope for the best.
Here is exactly what you need to hoard for the perfect batch:
- 1/2 Cup (1 Stick) Unsalted Butter: Soften it to room temperature. Some old-school recipes use shortening, but butter tastes infinitely better.
- 1/2 Cup Creamy Peanut Butter: Do not use natural peanut butter. You know, the kind with the oil slick on top that you have to stir? Leave that for your toast. You need the processed, stabilized stuff (like Jif or Skippy). Natural PB messes up the fat ratio and makes the cookies spread into greasy frisbees.
- 1/2 Cup Granulated Sugar: Plus another 1/3 cup for rolling the balls.
- 1/2 Cup Packed Brown Sugar: Light or dark works, but dark adds more molasses flavor.
- 1 Large Egg: Room temperature.
- 1 Tablespoon Milk: This keeps the dough soft.
- 1 Teaspoon Vanilla Extract: Measure with your heart.
- 1 3/4 Cups All-Purpose Flour: Spoon and level it so you don’t pack it down.
- 1 Teaspoon Baking Soda: For the puff.
- 1/2 Teaspoon Salt: To cut the sweetness.
- 1 Bag (approx. 40) Hershey’s Kisses: Unwrap them before you start baking. Trust me.
Step 1: The Creaming Phase
Start by unwrapping your chocolates. Put them in a bowl and set them aside. Do not skip this. You will not have time to unwrap them later when the cookies come out of the oven.
Grab a large bowl or your stand mixer. Toss in the 1/2 cup softened butter, 1/2 cup peanut butter, 1/2 cup granulated sugar, and 1/2 cup brown sugar.
Beat them together on medium-high speed. We want this mixture light and fluffy. Let it run for about 2–3 minutes.
Why beat it this long? We need to aerate the fat. This creates pockets of air that expand in the oven, giving the cookies a tender crumb rather than a dense, heavy texture.
Scrape down the sides of the bowl. Add the egg, milk, and vanilla. Beat again until combined. It should look creamy and smell amazing. 🧈
Step 2: The Dry Mix
In a separate medium bowl, whisk together the 1 3/4 cups flour, 1 teaspoon baking soda, and 1/2 teaspoon salt.
Pour the dry ingredients into the wet mixture.
Turn your mixer to low speed. Mix just until the flour disappears.
Stop immediately. If you overmix the dough now, you develop gluten. Gluten makes bread chewy, but it makes cookies tough. We want these to melt in your mouth, not fight back. The dough will feel a bit soft, but that is okay.
Step 3: The Chill (Optional but Recommended)
If your kitchen feels hot or your butter was a little too soft, stick the bowl of dough in the fridge for 20–30 minutes.
Chilling the dough creates a thicker cookie that holds its shape better. If you bake warm dough, it spreads faster than the edges can set. However, if you are impatient (like me), you can skip this step as long as your dough feels handleable. 🧊
Step 4: The Roll and Coat
Preheat your oven to 375°F (190°C). Line your baking sheets with parchment paper or silicone mats.
Pour the extra 1/3 cup of granulated sugar into a small bowl.
Scoop the dough into 1-inch balls. You can use a small cookie scoop to keep them uniform, or just eyeball it.
Roll each ball between your palms to make it smooth.
Drop the ball into the sugar bowl. Roll it around until it looks like a little snowball. Coat it generously.
Place the balls on the baking sheet about 2 inches apart. Do not flatten them! Leave them as spheres. The oven will do the flattening for you. 🎱
Step 5: The Bake and The Press
Slide the pan into the oven.
Bake for 8–10 minutes.
Crucial Timing: Watch them closely. You want the edges to look slightly set and golden, but the centers should still look soft. Do not bake them until they look firm, or they will turn into rocks once they cool.
Pull the pan out of the oven. Immediately grab your unwrapped Kisses.
Press one chocolate firmly into the center of each hot cookie.
The Crack: As you press down, the edges of the cookie will crack open. This is exactly what you want. It gives the cookie that signature “blossom” look.
Do not touch them after this. The residual heat from the cookie will melt the bottom of the chocolate, welding it to the base. If you move them now, the chocolate might tip over or lose its shape.
Let them cool on the baking sheet for 5 minutes, then transfer them to a wire rack to finish cooling.
Troubleshooting: Why Do My Blossoms Look Sad?
Did things go sideways? Let’s diagnose the problem so you can fix it for batch number two.
- The Cookies Flattened Out: You probably used natural peanut butter or your butter was melted rather than softened. Also, check your baking soda freshness.
- The Chocolate Turned White: This is called “bloom.” It happens when the chocolate gets too hot and the cocoa butter separates. Next time, wait just 30 seconds after pulling the cookies out of the oven before pressing the Kiss in.
- The Dough is Crumbly: You might have measured the flour by scooping the cup directly into the bag, which packs it down. Add a splash more milk to bring it back together. 🥛
Variations: Breaking Tradition
Once you master the classic, you can start experimenting. Purists might give you side-eye, but who cares?
The “Inside Out” Blossom
Use a chocolate cookie dough base and press a peanut butter cup or a white chocolate Kiss into the center. It flips the flavor profile on its head.
The Caramel Twist
Roll the dough balls in coarse sea salt and sugar. Press a caramel-filled chocolate (like a Rolo) into the center. The salt/caramel/peanut butter combo hits every pleasure center in the brain.
The Cookie Butter Swap
Swap the peanut butter for Biscoff (cookie butter) or Nutella. You lose the savory edge, but you gain a deep, spiced sweetness that pairs perfectly with coffee. ☕
Storage and Freezing
These cookies are sturdy. They travel well, which makes them perfect for mailing to friends or bringing to the office.
- Room Temperature: Store them in an airtight container for up to 5 days.
- Freezing: Place the baked cookies in a freezer-safe bag. They last for 3 months.
- Pro Tip: If you stack them in a container, offset the layers so the pointy tip of the Kiss doesn’t poke into the bottom of the cookie above it. Or just eat the top layer immediately to solve the problem. FYI, that’s my preferred method.
Nutritional Information (Per Cookie)
I’m going to level with you. These are calorie bombs. But they are small, so that makes it okay, right?
Estimates based on a batch of 40 cookies:
- Calories: ~110 kcal 🔥
- Total Fat: 6g
- Saturated Fat: 2.5g
- Cholesterol: 10mg
- Sodium: 80mg
- Carbohydrates: 13g
- Sugar: 9g
- Protein: 2g
Note: The calorie count depends heavily on how much sugar you roll them in and the size of your scoop. But let’s not do math while eating cookies.
Conclusion
Peanut Butter Blossoms prove that simple is often better. You don’t need fancy molds, piping bags, or obscure ingredients to make a masterpiece. You just need good peanut butter, a hot oven, and the patience to unwrap a bag of chocolates.
These cookies act as a time machine. One bite takes you back to childhood kitchens and holiday excitement. They offer comfort, crunch, and chocolate in a single package.
So, go buy the jar of Jif. Get the Kisses. And maybe invite a friend over to help with the unwrapping duty.