
Let’s be honest for a second. Sometimes you need a cookie, and you need it roughly ten minutes ago. You don’t have the patience to preheat the oven, wait for butter to soften, or deal with the emotional roller coaster of wondering if your edges will burn before the center cooks. I have been there. We have all been there. 🍪
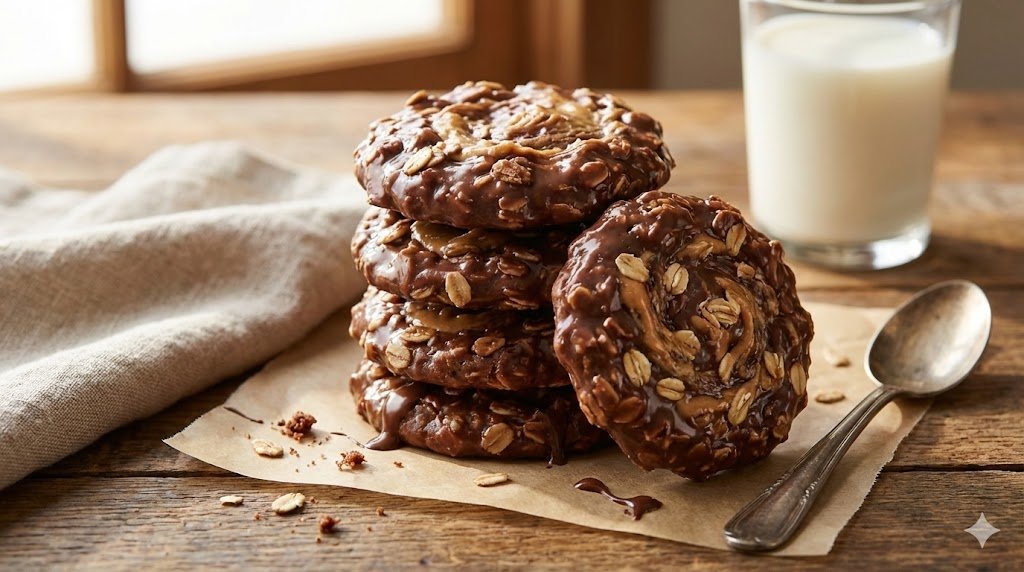
Enter the No-Bake Chocolate Peanut Butter Cookie. This isn’t just a dessert; it is a life raft for the impatient sweet tooth. These little fudgy, oat-filled discs of joy hold a special place in the hearts of anyone who grew up attending potlucks or school bake sales. They require zero baking skill, standard pantry ingredients, and a very specific attention to timing that we will discuss shortly.
I personally ruined my first three batches of these back in college because I thought “boil for a minute” was merely a suggestion. It is not. But don’t worry, I made those mistakes so you don’t have to. We are going to make the best batch of cookies you have ever tasted, and we won’t even touch the oven dial. 🎯
Why These Cookies Belong in Your Repertoire
You might ask, “Why make these when I can buy cookies?” First off, store-bought cookies rarely achieve this specific texture. We are aiming for a cross between a piece of fudge and a granola bar. They offer that perfect dense, chewy bite that melts in your mouth. 🤤
Plus, these cookies rely on pantry staples. You likely have everything you need in your kitchen right now. They also come together in about 15 minutes, start to finish. That beats the hour-long process of traditional baking any day.
Finally, they are the ultimate comfort food. The combination of chocolate and peanut butter creates a flavor profile that pretty much everyone enjoys. Unless you are allergic to peanuts, in which case, please substitute almond butter or sunflower butter so you don’t end up in the ER. That kills the vibe. 🚑
The Holy Grail Ingredient List
Let’s look at exactly what you need. Do not deviate from this list unless you know exactly what you are doing. Baking (even no-baking) is chemistry, after all.
The Wet Stuff
- 1/2 cup (1 stick) Unsalted Butter: You can use salted if you prefer a sweet-salty combo, but I prefer controlling the salt myself. Cut it into cubes so it melts faster.
- 2 cups Granulated Sugar: Yes, that is a lot of sugar. No, we are not counting calories today. This sugar creates the structure of the cookie. Without it, you just have wet oats. 🍬
- 1/2 cup Whole Milk: You need fat here. Skim milk works, but the cookies won’t taste as rich. Stick to whole milk or even 2% for the best results.
- 1 teaspoon Vanilla Extract: Use the real stuff. Imitation vanilla tastes like chemicals IMO.
The Flavor & Structure
- 1/4 cup Unsweetened Cocoa Powder: This provides the chocolate element. Sift it if it looks lumpy. Nobody wants a pocket of dry cocoa dust in their bite.
- 1/2 cup Creamy Peanut Butter: Crucial Point: Use a standard commercial brand like Jif or Skippy. Natural peanut butter (the kind you have to stir) often separates and creates an oily mess in this recipe. Stick to the processed stuff for consistency. 🥜
- 3 cups Quick-Cooking Oats: Do not use Old Fashioned Rolled Oats unless you want your jaw to get a workout. Quick oats absorb the liquid better and create that tender texture we want.
- A pinch of Salt: To balance the sweetness.
The Method: How to Master the “Boil”
This is the part where things get serious. The success of this recipe hinges entirely on how you handle the boiling process. Grab your saucepan and let’s get to work.
Step 1: Prep Your Station
Lay out two large sheets of wax paper or parchment paper on your counter. You need to do this before you turn on the stove. Once the mixture is ready, it sets fast. You won’t have time to fumble around for paper later. trust me on this. 📜
Measure your oats, peanut butter, and vanilla into a bowl and set them right next to the stove. You need them within arm’s reach.
Step 2: The Melt
Grab a medium-to-large saucepan. Combine the butter, sugar, milk, and cocoa powder. Turn the heat to medium. Stir this mixture constantly as the butter melts and incorporates with the sugar and cocoa. 🥄
Keep stirring. You want everything to combine into a smooth, dark chocolate liquid. It will look gritty at first because of the sugar, but that’s normal.
Step 3: The 60-Second Rule
Here is the make-or-break moment. Watch the pot. You are looking for a full rolling boil. This means bubbles are bursting rapidly all over the surface, not just bubbling around the edges.
Once that rolling boil hits, start a timer for exactly 60 seconds. ⏱️
- Boil less than 60 seconds: The sugar won’t reach the “soft ball” stage, and your cookies will never set. They will remain a sticky goo forever.
- Boil more than 60 seconds: The mixture creates a dry, crumbly mess that falls apart before you even scoop it.
Boil for one minute while stirring occasionally. When the alarm goes off, remove the pan from the heat immediately. 🔥
Step 4: The Mix
Work quickly now. Stir in the peanut butter and vanilla extract until the peanut butter fully melts into the hot chocolate syrup. It should look glossy and smooth.
Next, dump in the oats. Stir vigorously. You want every single oat flake coated in that chocolatey goodness. The mixture will feel heavy and thick. 💪
Step 5: The Drop
Grab two spoons or a cookie scoop. Drop spoonfuls of the mixture onto your prepared wax paper. You can make them as huge or as tiny as you want, but I usually aim for about 2 tablespoons per cookie.
If they look like mounds, you can gently flatten them with the back of the spoon. Let them sit at room temperature until they cool and harden completely. This usually takes about 20 to 30 minutes, depending on how humid your kitchen is.
Troubleshooting: Why Do My Cookies Look Weird?
Even the best of us mess these up sometimes. Here is a quick diagnostic guide to figure out what went wrong so you can fix it next time.
“My Cookies Are Just Puddles”
You likely didn’t boil the mixture long enough. If you start the timer the second you see one tiny bubble, you didn’t reach the right temperature. Next time, wait for that aggressive, angry boil before hitting start.
Alternatively, humidity kills these cookies. If it is raining heavily, the extra moisture in the air can prevent the sugar from setting properly. Maybe save this recipe for a sunny day. ☀️
“My Cookies Are Dry and Crumbly”
You boiled it too long. It happens. The sugar cooked past the soft-ball stage and turned into hard candy. Or, you might have measured your oats with a heavy hand. When baking, always fluff your oats before scooping them to avoid packing too much into the cup.
“They Look Dull”
This usually means the butter and sugar didn’t emulsify perfectly, or you used low-fat milk. They will still taste good, though, so don’t stress about it too much. :/
Variations to Spice Things Up
Once you master the classic, you can start experimenting. I love tweaking recipes to see what happens. Here are a few ideas that actually work.
The Nutella Swap
Swap half of the peanut butter for Nutella. This kicks the chocolate flavor into overdrive. It makes the cookies slightly sweeter, so you might want to add an extra pinch of coarse sea salt on top to cut the sugar. 🍫
The Crunch Factor
Add 1/2 cup of Rice Krispies cereal and reduce the oats by 1/2 cup. This adds a delightful crunch that breaks up the density of the oats. It gives it a texture similar to a Star Crunch (remember those?).
Coconut Dream
Stir in 1/2 cup of shredded coconut with the oats. The coconut adds a chewiness that pairs beautifully with the chocolate. It feels a bit fancy, even though you made it in a pot in your pajamas. 🥥
Nutritional Information (Per Serving)
Okay, look. We don’t eat these for their health benefits. We eat them for the soul benefits. But, since you asked, here is the breakdown. This recipe yields approximately 24 cookies.
- Calories: ~115 kcal
- Carbohydrates: 18g
- Fat: 5g
- Protein: 2g
- Sugar: 12g
- Fiber: 1g
Note: These numbers vary based on the specific brands of peanut butter and milk you use. Treat this as a rough guide, not a medical chart.
Storage: Keeping Them Fresh
If you somehow manage not to eat the entire batch in one sitting (a feat I have rarely accomplished), you need to store them properly.
Place the cookies in an airtight container. Layer them with wax paper between the stacks so they don’t stick together. They will stay fresh at room temperature for about 3 to 4 days.
Pro Tip: Put them in the fridge. I actually prefer these cookies cold. The texture becomes firmer, almost like a candy bar. Plus, out of sight, out of mind? Maybe not. They also freeze incredibly well. Just toss them in a freezer bag, and they will last for up to three months. ❄️
Final Thoughts
You now possess the knowledge to create the ultimate No-Bake Chocolate Peanut Butter Cookies. This recipe saves time, satisfies intense cravings, and brings a wave of nostalgia that few other desserts can match.
Remember the golden rule: Respect the boil. Treat that 60-second timer with the reverence it deserves, and you will get perfect results every time.