
Let’s be real for a second. We all love the idea of cherry pie. The bubbling red filling, the flaky crust, the scoop of vanilla ice cream melting into the cracks—it’s the American dream on a plate. But actually making one? That’s a different story. You have to chill the dough, roll it out without tearing it (impossible), and weave a lattice top that looks like a basket instead of a crime scene. Honestly, who has the time?
Enter Cherry Pie Bars. These little squares of heaven solve every single problem associated with traditional pie. You get all the glory—the buttery crust, the tart cherries, the sweet crumble—with about 10% of the effort. You don’t even need a rolling pin. You literally just dump ingredients into a bowl and press them into a pan.
I still remember the first time I made these. I had a bag of frozen cherries that had been sitting in my freezer since the Ice Age. I didn’t want to make a smoothie. I wanted dessert. So, I threw together a quick shortbread, simmered the fruit, and hoped for the best. The result was arguably better than any pie I’ve ever slaved over. The crust was sturdier, the filling was jammy, and I could eat it with my hands. Win-win. 🍒
Today, we ditch the pie plate. We are making the ultimate crowd-pleaser that requires zero geometry skills. Whether you use fresh cherries from the farmers’ market or that bag in the back of your freezer, these bars will make you look like a pastry genius.
Why Bars Beat Pie Every Single Time
You might wonder, “Is this just a lazy man’s pie?”
Yes. And I say that with pride. But beyond the laziness, bars offer a superior eating experience.
First, consider the Crust-to-Filling Ratio. In a slice of pie, the ratio varies depending on where you cut. The edge is all crust; the tip is all goo. With a bar, you get the perfect stack—crust, fruit, crumble—in every single bite. It’s consistent.
Second, consider Structural Integrity. You can pick up a bar. Try picking up a slice of warm cherry pie with your hands. You will end up with red goo on your shirt and sadness in your heart. Bars travel well, freeze well, and don’t require a fork.
Plus, you get that Crumble Topping. IMO, a crumble beats a pastry crust any day. It adds texture and a sugary crunch that contrasts perfectly with the soft fruit. 🥧
The Grocery List (Pantry Raid Time)
You probably have most of these items right now. We keep it simple because the cherries need to shine.
The Shortbread Dough (Crust & Topping)
- 1 Cup (2 Sticks) Unsalted Butter: Softened to room temperature. This is crucial for creaming.
- 1 Cup Granulated Sugar: White sugar keeps the crust crisp.
- 1 Teaspoon Vanilla Extract: Use the real stuff.
- 1/2 Teaspoon Almond Extract: Do not skip this. Cherries and almonds are soulmates. The almond extract enhances the cherry flavor in a way vanilla just can’t.
- 1 Teaspoon Salt: To balance the sugar.
- 3 Cups All-Purpose Flour: Spoon and level it. Don’t scoop, or you’ll pack the flour and get dry bars.
The Cherry Filling
- 4 Cups Cherries: Fresh or frozen (pitted, obviously). Sour cherries are best, but sweet ones work too.
- 1/2 Cup Granulated Sugar: Adjust this depending on how sweet your fruit is.
- 2 Tablespoons Cornstarch: This thickens the juices so you don’t end up with soggy bars.
- 1 Tablespoon Lemon Juice: Freshly squeezed. The acid wakes up the fruit flavor.
Step 1: The Cherry Filling (Homemade vs. Canned)
Okay, let’s address the elephant in the room. Can you use canned cherry pie filling?
Technically, yes. If you are in a massive rush, go buy a can of the “premium” filling. I won’t judge you (much). But honestly, making your own takes 10 minutes and tastes infinitely better. Canned filling often tastes like red food dye and corn syrup. Homemade tastes like actual fruit.
To make the filling: Grab a medium saucepan. Toss in the 4 cups of cherries, 1/2 cup sugar, cornstarch, and lemon juice.
Turn the heat to medium. Stir constantly.
As the cherries heat up, they release their juices. The mixture will look watery at first. Keep stirring.
After about 5–7 minutes, the liquid will boil and thicken into a glossy, jammy sauce. It should coat the back of your spoon.
Remove the pan from the heat. Let it cool slightly while you make the crust. If you pour boiling hot lava onto the dough, you might melt the butter too fast. 🛑
Step 2: The Dough (One Bowl Wonder)
Preheat your oven to 375°F (190°C).
Line a 9×13 inch baking pan with parchment paper. Leave a little overhang on the sides so you can lift the bars out later. Grease the paper lightly.
In a large bowl (or stand mixer), beat the 1 cup softened butter and 1 cup sugar until light and fluffy. This takes about 2 minutes.
Add the vanilla and almond extract. Beat again.
Add the salt and the 3 cups flour.
Mix on low speed just until crumbly dough forms. It won’t form a cohesive ball; it should look like coarse, wet sand. If you squeeze a handful, it should stick together.
The Split: This is the best part. You don’t need two separate recipes for crust and topping. Take about 2/3 of the dough mixture and dump it into your prepared pan. Reserve the rest for the top. 🥣
Step 3: The Assembly
The Press: Use your hands or the bottom of a measuring cup to press the dough firmly into the bottom of the pan. Make it even. This foundation needs to support the weight of the fruit.
The Pour: Spread your cherry filling evenly over the crust. Use a spatula to get it all the way to the corners.
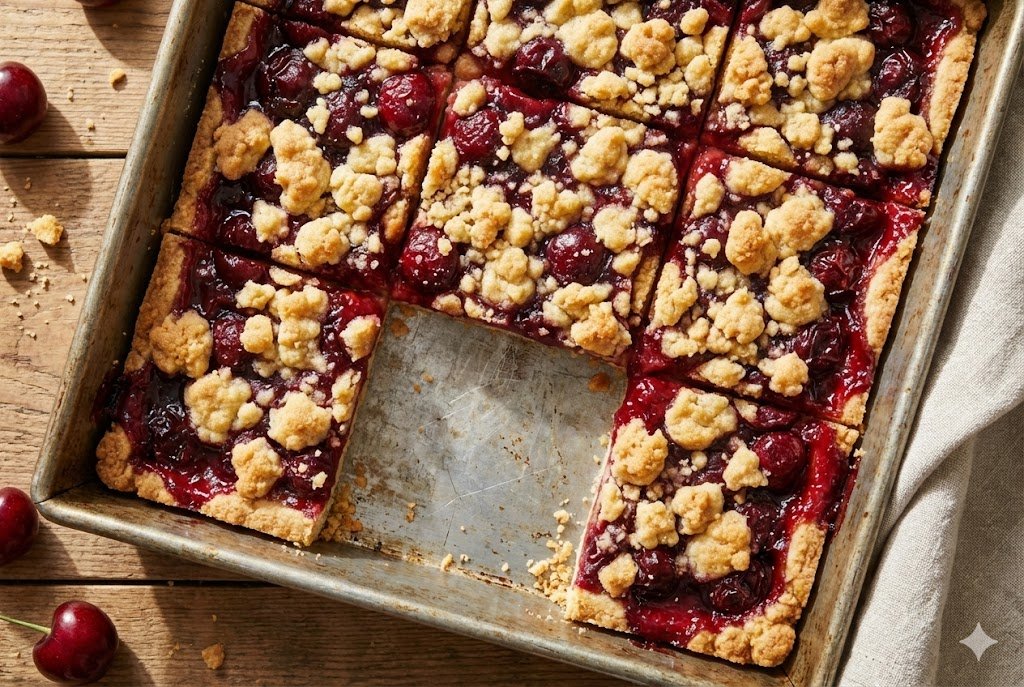
The Crumble: Take the reserved dough. Use your fingers to crumble it over the top of the cherries. Don’t try to cover every millimeter of fruit. Leave some red peeking through. It looks rustic and beautiful that way.
Step 4: The Bake (Watch for Bubbles)
Slide the pan into the oven.
Bake for 35–45 minutes.
What to look for: You want the topping to turn a nice golden brown. More importantly, you want the fruit filling to bubble. I don’t mean a lazy bubble; I mean a vigorous, “I’m alive” bubble.
Why? Cornstarch needs to reach a boiling temperature to fully activate its thickening power. If you pull the bars before the center bubbles, the filling will be runny when you cut it. Let it bubble! 🔥
Step 5: The Cool Down (Patience Required)
Remove the pan from the oven and place it on a wire rack.
Now, you wait.
I know, it smells amazing. The almond and cherry scent is wafting through your kitchen. You want to dig in with a spoon. Don’t do it.
If you cut these bars while they are hot, they will fall apart. The filling needs to cool and set. The butter in the crust needs to resolidify.
Let them cool completely in the pan. This takes at least 2–3 hours.
Pro Tip: Once they reach room temperature, pop the pan in the fridge for an hour. Chilled bars cut into razor-sharp squares.
Lift the slab out using the parchment handles. Place on a cutting board and slice into squares.
Troubleshooting: Why Are My Bars messy?
Did things go sideways? Let’s diagnose the disaster.
- The Bottom is Soggy: You didn’t cook the filling long enough on the stove, or you didn’t let it bubble in the oven. Next time, add an extra teaspoon of cornstarch if your cherries are extra juicy.
- The Topping Burned: Your oven rack is too high. Move it to the center. If it browns too fast, tent the pan with foil for the last 10 minutes.
- It Tastes “Fake”: You skipped the lemon juice. Fruit needs acid to taste like fruit. Otherwise, it just tastes like sugar.
- The Crust is Tough: You overmixed the dough or scooped the flour too heavily. Keep a light hand!
Variations: Switch It Up
Once you master the cherry version, you can apply this “crust + fruit + crumble” formula to almost anything.
The “Black Forest” Vibe
Add 1/2 cup of mini chocolate chips to the crust mixture. Chocolate and cherries are a classic combo for a reason.
The Blueberry Lemon
Swap cherries for blueberries. Increase the lemon juice to 2 tablespoons and add lemon zest to the crust.
The Nutty Crunch
Add 1/2 cup of sliced almonds or chopped pecans to the reserved topping dough. It adds a great crunch that mimics a fruit crisp.
Nutritional Information (Per Bar)
Look, these contain butter and sugar. They aren’t kale chips. But they are good for the soul.
Estimates based on 24 bars:
- Calories: ~190 kcal
- Total Fat: 9g
- Saturated Fat: 5g
- Cholesterol: 25mg
- Sodium: 100mg
- Carbohydrates: 28g
- Fiber: 1g
- Sugar: 18g
- Protein: 2g
FYI: Just eat two. They are small.
Conclusion
Cherry Pie Bars prove that you don’t need to be a pastry chef to impress people. They deliver big, bold flavors with minimal kitchen trauma.
They look stunning on a dessert platter, bursting with red fruit and golden crumbs. And honestly, they taste better the next day once the crust softens slightly from the fruit juices.
So, grab those cherries. Skip the rolling pin. And treat yourself to a slice of the good life.