
You scroll through social media and immediately spot them. Those impossibly perfect, tall cakes feature golden caramel running exactly halfway down the frosted sides. You stare at your screen and assume you need a professional pastry degree to build one. You absolutely do not. 📱
I ruined my very first attempt and created a sticky, miserable kitchen disaster. I eagerly poured boiling hot caramel directly over soft buttercream, and the entire cake immediately collapsed into a puddle :/ I learned the hard science of cake decorating the hard way. Today, I share my ultimate secrets with you so you skip the tears and jump straight to the triumph.
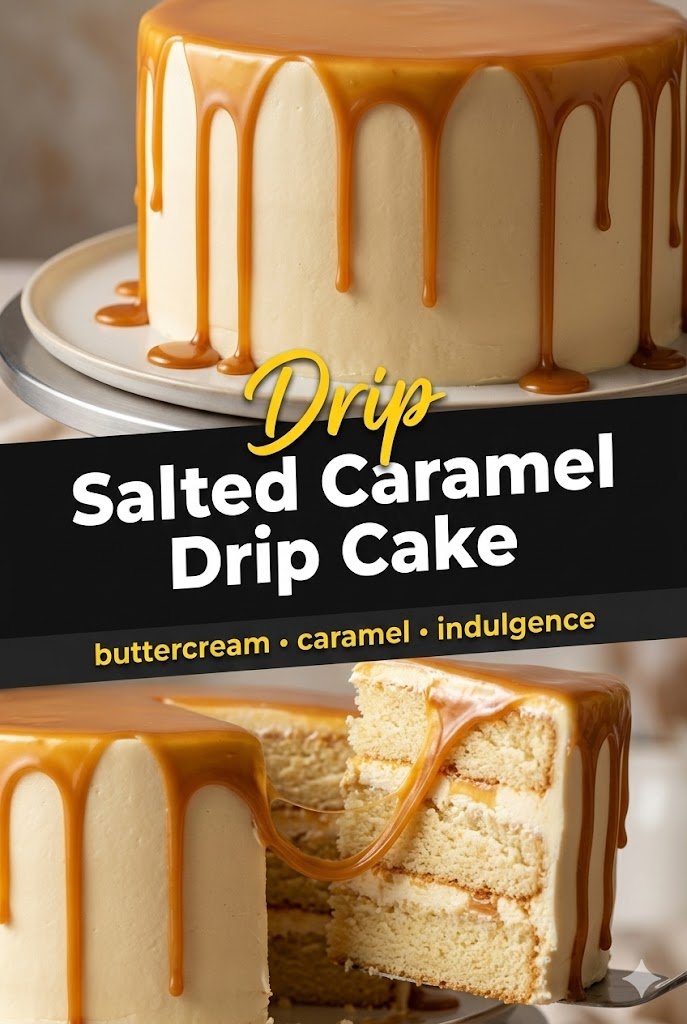
We will conquer the [ Salted Caramel Drip Cake ] together right now. You just need a little patience, a reliable refrigerator, and a serious love for butter. 🧈 Grab your mixing bowls, turn on your oven, and let us build an absolute showstopper.
Why You Need This Masterpiece in Your Life
Have you ever wondered why chefs constantly combine salt and sugar? The human palate craves contrast. When you eat a completely sweet dessert, your taste buds quickly experience flavor fatigue. You take three bites, and you suddenly feel overwhelmed by the sugar. 🛑
Salt changes the entire equation. A sharp hit of sea salt actively enhances the rich, dark notes of the caramelized sugar. It cuts straight through the heavy vanilla buttercream and keeps you reaching for another slice.
IMO, you simply cannot buy this specific flavor profile at a standard grocery store. Commercial bakeries rely on artificial syrups and cheap vegetable oils to cut their costs. When you bake this [ Salted Caramel Drip Cake ] at home, you use real butter, heavy cream, and genuine vanilla. You taste the immense quality difference in every single bite. 🍰
The Science of the Perfect Sugar Drip
You face one major boss battle when you construct this dessert: temperature control. The caramel drip strikes fear into the hearts of amateur bakers everywhere. You must understand the basic physics of sugar to win this fight. 🧪
If your caramel runs too hot, it acts like a laser beam. It will instantly melt your beautiful buttercream and pool at the bottom of your cake stand. If your caramel sits too cold, it turns into sticky cement. You will squeeze your bottle, and nothing will come out.
You need the Goldilocks zone. You must chill your frosted cake until the buttercream feels completely solid to the touch. Simultaneously, you must cool your caramel to exactly room temperature. 🌡️ When room-temperature caramel meets a freezing cold cake, the drip travels halfway down the side and stops perfectly in its tracks.
Essential Kitchen Gear for a Flawless Finish
You do not need a commercial kitchen to build this beauty, but you definitely need a few specific tools. You cannot fake a smooth cake finish with a standard butter knife. 🛠️
- A revolving cake turntable: You spin the cake while you hold your scraper still. This simple motion guarantees perfectly smooth buttercream sides.
- A tall metal bench scraper: You press this flat edge against the spinning cake to remove excess frosting and create sharp, professional edges.
- A plastic plastic squeeze bottle: You pour your cooled caramel into this bottle. It gives you total, precise control over the size and length of every single drip. 🍼
- Three 8-inch round cake pans: You need heavy aluminum pans to ensure your sponges bake evenly without burning the delicate edges.
The Ultimate [ Salted Caramel Drip Cake ] Recipe
I aggressively tested these ratios to give you the perfect balance of moist brown sugar sponge, fluffy frosting, and sticky caramel. Please measure your ingredients precisely. Baking demands exact science! ⚖️
The Brown Sugar Sponge Ingredients
- 3 cups all-purpose flour
- 2 cups packed light brown sugar
- 1 tablespoon baking powder
- 1 teaspoon fine sea salt
- 1 cup (2 sticks) unsalted butter (softened to room temperature) 🧈
- 4 large eggs (room temperature)
- 1 cup full-fat buttermilk (room temperature)
- 1 tablespoon pure vanilla extract
The Sticky Salted Caramel Ingredients
- 1 cup granulated white sugar
- 1/4 cup tap water
- 6 tablespoons unsalted butter (cut into small cubes)
- 1/2 cup heavy whipping cream (room temperature)
- 1 teaspoon flaky sea salt (like Maldon) 🧂
The Vanilla Buttercream Ingredients
- 1 1/2 cups (3 sticks) unsalted butter (softened)
- 4 cups powdered sugar (sifted)
- 1/4 cup heavy whipping cream
- 1 tablespoon pure vanilla extract
Step-by-Step Construction Instructions
Follow these exact steps methodically. Do not rush the crucial cooling phases! ⏱️
Phase One: Baking the Sponges
- Preheat your oven to 350°F (175°C).
- Grease your three 8-inch cake pans aggressively and line the bottoms with parchment paper rounds.
- Whisk the flour, baking powder, and sea salt together in a medium bowl.
- Beat the softened butter and brown sugar in your large mixer bowl on medium-high speed for five solid minutes until fluffy and pale. ☁️
- Add the room-temperature eggs one at a time, mixing thoroughly after each single addition.
- Mix the vanilla extract directly into the wet ingredients.
- Alternate adding the dry flour mixture and the buttermilk, starting and ending with the flour. Mix only until you hide the dry flour streaks.
- Divide the thick batter evenly among your three prepared pans.
- Bake the cakes for 25 to 30 minutes. You must pull a clean wooden skewer from the center to verify doneness.
- Cool the cakes entirely on a wire rack before you attempt to frost them. ❄️
Phase Two: Crafting the Caramel
- Stir the white sugar and water together in a medium stainless-steel saucepan until the mixture looks like wet sand.
- Place the saucepan over medium heat. Do not stir the pan again! Stirring causes aggressive sugar crystallization. 🛑
- Watch the boiling sugar closely until it turns a deep amber color (this usually takes about 7 to 10 minutes).
- Remove the pan immediately from the heat.
- Whisk the butter cubes into the hot sugar rapidly. The mixture will bubble violently! 🌋
- Pour the heavy cream slowly into the pan while whisking constantly until you create a smooth sauce.
- Stir the flaky sea salt into the finished caramel.
- Pour the hot caramel into a heat-safe glass jar and let it cool completely to room temperature.
Phase Three: Building the Buttercream
- Beat the softened butter in your mixer bowl on high speed for exactly five minutes until it looks incredibly pale and creamy.
- Add the sifted powdered sugar one cup at a time, mixing on low speed so you do not create a massive sugar cloud in your kitchen. 🌪️
- Pour the heavy cream and vanilla extract directly into the frosting.
- Whip the mixture on high speed for three final minutes to incorporate plenty of air.
Phase Four: The Final Assembly and Drip
- Place your first completely cooled cake layer onto your turntable.
- Spread an even layer of vanilla buttercream over the top.
- Drizzle two tablespoons of your cooled caramel directly over the buttercream layer. 🥄
- Repeat this process with the second cake layer.
- Place the final cake layer on top, bottom-side up, to guarantee a perfectly flat roof.
- Spread a very thin layer of frosting over the entire cake to trap the crumbs (bakers call this the crumb coat).
- Chill the crumb-coated cake in your refrigerator for exactly twenty minutes. 🧊
- Frost the chilled cake with a final, thick layer of buttercream. Use your metal bench scraper to achieve perfectly smooth sides.
- Chill the fully frosted cake for another thirty minutes until the exterior feels rock solid.
- Pour your room-temperature caramel into your plastic squeeze bottle.
- Squeeze the bottle gently right at the top edge of the cold cake, allowing the caramel to slowly drip down the sides. 💧
- Fill the center of the cake roof with the remaining caramel and smooth it flat with an offset spatula.
Nutritional Information (Per Serving)
I calculated this data assuming you cut this massive cake into exactly fourteen generous slices. You definitely eat this treat for pure happiness, not for a strict diet! 🔥
- Calories: 650 kcal
- Carbohydrates: 78g
- Sugars: 58g
- Protein: 6g
- Fat: 35g
Troubleshooting Common Cake Disasters
Sometimes things go wrong, even for the most careful bakers. We can fix almost any disaster if we prepare correctly and understand the chemistry. 🛠️
Did your caramel completely crystallize and turn into a hard, grainy rock in the saucepan? You definitely stirred the sugar while it boiled. You must resist the urge to touch the spoon! If you see sugar crystals forming on the sides of the pan, you just dip a pastry brush in wet water and brush the sides down gently.
Did your buttercream turn into a runny, soupy mess? You probably added the butter while it was too warm, or your kitchen environment feels too hot. Do not throw it away! You just place the entire mixing bowl in the refrigerator for fifteen minutes. The cold air firms up the butterfat. You whip it again, and you instantly restore the fluffy texture. ❄️
FYI, if your cake layers dome aggressively in the oven, you must slice the rounded tops off with a serrated knife before assembly. You absolutely cannot stack rounded cakes, or your beautiful tower will lean and eventually collapse onto your table.
How to Store Your Golden Masterpiece
You probably will eat a massive portion of this cake immediately with your friends. However, you must store the leftovers correctly to maintain that incredible moisture. 🧊
You press a piece of plastic wrap directly against the exposed cake slices to prevent the sponge from drying out. You place the entire cake in the refrigerator. The heavy dairy in the buttercream and the caramel requires constant refrigeration to stay food-safe.
When you want to eat a leftover slice the next day, you face one minor challenge. Cold butter tastes like hard wax. You must pull your slice out of the fridge and let it sit on the counter for exactly one hour before eating. You let the buttercream soften back into a luscious, velvety texture, and the caramel regains its glorious, sticky pull. 🤤
Claim Your Pastry Crown
We completely demystified the magic behind this iconic, highly photogenic dessert today. You now hold the perfect, foolproof recipe. You understand the crucial temperature control science, you know exactly how to conquer the sugar boiling process, and you possess the ultimate presentation hacks. 🎉
Stop paying premium bakery prices for a dessert you can master at home. You deserve a dynamic, visually stunning cake that actually backs up its looks with incredible flavor. Grab your tall scraper, brown your sugar, and start squeezing that drip bottle. Your weekend dessert table desperately needs this massive upgrade.